Wiki Guide: How to Extract Data from Wikipedia Using an API?
![Muninder Adavelli]()

Muninder Adavelli
Updated · Feb 11, 2024
Updated · Aug 11, 2023
Daniel is a curious thinker that loves everything about tech. If he spots something interesting, res... | See full bio
Girlie is an accomplished writer with an interest in technology and literature. With years of experi... | See full bio
This page may contain links to our partners’ products and services, which allows us to keep our website sustainable. Тechjury.net may receive a compensation when you sign up and / or purchase a product or a service using our links. As an Amazon Associate we earn commissions from qualified purchases. This comes at no extra cost to you. On the contrary, these partnerships often allow us to give you discounts and lower prices. However, all opinions expressed on our site are solely ours, and this content is in no way provided or influenced by any of our partners.
A 3D printer is a device that brings three-dimensional designs to life. It has found its way into various industries due to its wide range of capabilities.
Among these industries are aerospace, automotive, and healthcare, which are crucial to creativity and technological advancement.
The global market for 3D printers is expected to reach $56.48 billion in 2030. It has indeed come a long way since its inception.
|
💁Quotable Quote: “3D printing can revolutionize the way we make almost everything.” - Former President Barack Obama |
While 3D printers have been around for a while, many people still need to learn how they operate, and this article will show you how.
Unlike standard printers that use ink or toner, 3D printers use a type of plastic called a filament.
The 3D printer takes the filament and heats it until it becomes soft and flexible. It then squeezes out the melted filament through a tiny nozzle.
The nozzle moves around, prints the first layer, waits for it to dry, and prints the next layer on top. As the printer continues adding layers, the object begins to take shape.
There’s more to it than just layers; learn more about the details below.
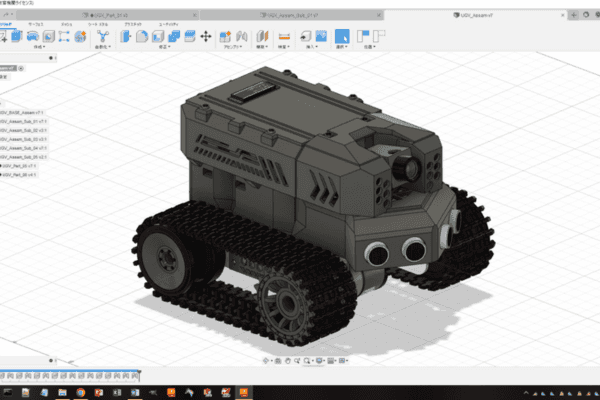
3D modeling is the process of developing three-dimensional models of objects using computer-based 3D modeling software such as SketchUp.
Modeling software allows artists, engineers, and designers to determine the design’s size, form, and texture. The procedure uses points, lines, polygons, and other elements only available in 3D modeling software.

There are three main techniques in 3D modeling. Look at each of them below.


Once the 3D design is finished, it is saved as either a stereolithography file (STL) or an additive manufacturing file (AMF).
If you are unfamiliar with the software listed above, here are some websites to obtain free and paid models:
A tiny nozzle moves around to print the design, but does it move independently? Venture into the next step to know the answer.
|
👍Helpful Article: If you're getting into 3D printing, start with something easy. Check out Techjury’s article on 50 3D Print Ideas to get your creative juices flowing. |
A slicer is an intermediary between a 3D CAD model and a 3D printer. It converts your 3D model into a language your 3D printer can understand—the G-code.

The G-code file provides instructions such as how the printer should move, what speed to utilize, and the size of the 3D printer filament to extrude.
There are various slicing programs that you can use, but the most popular software that is suitable for beginners is Cura.

With the digital blueprint and layers precisely sliced, it's time to layer your creation.
The following step will introduce you to the various technologies used in 3D printing.
|
📝Note: The printer must be calibrated before beginning the printing process. This also includes cleaning and leveling the build plate and loading the filament into the extruder. |
After you've finished slicing, you can upload the slice file to the printer and watch your design come to life. Recognize when they are most advantageous to designers, engineers, and product developers.
Take a look at some of the most common plastic 3D printing procedures.
This 3D printing technology, often known as Fused Filament Fabrication (FFF), is a popular procedure for hobbyist-level 3D printing.
It works by heating a thermoplastic filament to its melting point and then squeezing it out layer by layer.

Another process that uses this technique is Fused Deposition Modeling (FDM). This approach, however, has dimensional accuracy constraints.
FDM is commonly used for electrical wiring, construction and fit testing, jigs and fixtures, and investment casting patterns.
Photopolymerization is a technique that uses photopolymer resins to build detailed and accurate 3D objects layer by layer.
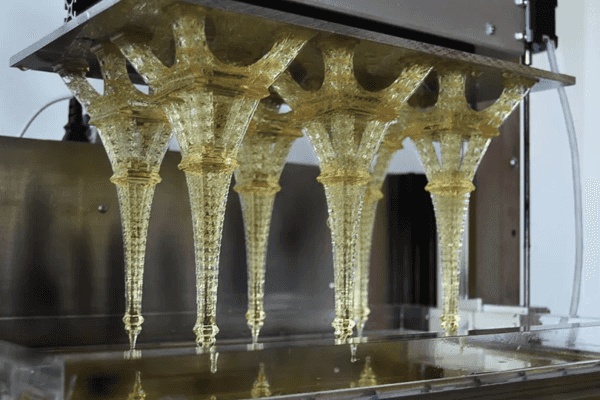
Each layer is subjected to a UV light source, such as a laser or projector, which cures the liquid resin selectively, hardening it and forming a solid connection between the layers.
The following are the most popular photopolymerization 3D printing technologies:
During the procedure, a concentrated ultraviolet or laser beam is directed onto the surface of a vat (or tank) containing a liquid photopolymer.
Each layer of the desired 3D item is created by cross-linking or decomposing a polymer.
The DMD chip consists of thousands of microscopic mirrors that tilt rapidly to reflect light and create a projected image.
Each mirror on the chip corresponds to a pixel on the screen, resulting in highly detailed visuals.
During the process, a light projector emits specific patterns of UV light, selectively curing the resin. This eliminates the need for layer-by-layer fabrication, resulting in significantly faster production times.
It's said to be a hundred times faster than regular 3D printing.
It makes use of unmodified LCD screens as well as a specially developed daylight polymer.
Photopolymerization allows for the creation of complex geometries and intricate internal structures that would be challenging or impossible to achieve through traditional manufacturing methods.

The technique is commonly employed in the medical field for anatomical models and microfluidics, dental applications, adornments, and amplifiers.
This method works by depositing a thin layer of powdered material onto the build platform, followed by drops of adhesive deposited by a print head to bind the particles together.
Metals, sands, and ceramics are among the materials that may be used in the process.

Binder jetting is ideal for applications requiring a high level of aesthetics and shape, such as architectural models, packaging, toys, and figurines, but is often unsuitable for functional purposes because of the brittle nature of the pieces.
A process that uses focused thermal energy to fuse wire or powder material as it is deposited, such as an electric arc, laser, or electron beam.

DEP is a complicated printing procedure typically used to repair high-end components and functional prototypes.
This method deposits layers of liquid material on print heads. Layers are supported by structures built of water-soluble material that may be washed away after the build.

It is one of the most expensive methods of 3D printing, even though the pieces are brittle and will degrade over time.
The most common applications of the material jetting process are the following:
This method creates 3D objects by stacking skinny metal sheets. Although the process could be more precise, it does produce extraordinarily rapid and cost-effective products.

As a result, there are few options for functional applications. The following are some of the most common sheet lamination applications:
PBF is a popular additive manufacturing technology due to its capacity to produce complicated geometries with precision.

A thin layer of powder is spread over a build platform, followed by applying the laser to fuse the particles based on a digital model's specifications.
Among the several Powder Bed Fusion procedures are:
PBF presents several applications, including jewelry, dental and medical prosthetics, prototypes, aerospace and defense, and motorsports.

Post-processing comprises the removal of support structures, the sanding of rough edges, and the application of finishes such as painting or varnishing the 3D prints.

This last step in 3D printing enhances the aesthetics and functionality of the printed object.
|
👍Helpful Articles: You can bypass the modeling process with a 3D scanner. This will scan a product, save it as an STL file, and 3D print the model. Learn more about Techjury’s articles on the best 3D scanners and a 3D Scanner Review. |
Materials used in 3D printing vary significantly, making it a viable alternative for various parts, from highly accurate aerospace and industrial machinery components to customized consumer goods.
Here are some materials you can choose from for your next project:


|
👍Helpful Articles: After learning the steps of 3D printing, read Techjury’s article on what you can make with a 3D printer and the best 3D printers in the UK. |
3D printing opens up a world of possibilities that no other medium can match. Every primary industry has embraced the technology.
However, like any other technical innovation, it has advantages and disadvantages.
Read on to find out about the pros and cons of 3D printing.
3D printing offers several advantages, making it a highly favorable technology in various fields.
Delve into these advantages and explore some of them in the following section.

Despite its numerous advantages, it is also essential to consider the potential drawbacks of 3D printing technology.
Explore some of the disadvantages of 3D printing below.

Here is a rundown of the benefits and drawbacks of 3D printing:
|
Advantages |
Disadvantages |
|
Environmentally Friendly |
Post-Processing |
|
Inexpensive |
Resource Availability |
|
Reduced Material Waste |
Structural Quality |
|
Medical Application |
Reduced Employment in Manufacturing Industries |
|
Fast Production |
Inaccurate Designs |
|
Robust And Lightweight Elements |
Counterfeits and Copyright Issues |
|
Adaptability In Design |
Limits on Building Size |
The rapid prototyping capabilities of 3D printing allow for quick iterations and cost-effective product development.
Along with its ability to create unique objects tailored to individual needs, it continues to shape industries and drive innovation.
As technological advances are made daily, the possibilities with 3D printers are endless, so keep an eye out.
3D printing itself is a legal activity. However, it's important to note that the legality of certain aspects can vary depending on factors such as the jurisdiction, the intended use of the printed objects, and potential intellectual property concerns.
A 3D printer cannot print anything more extensive than its print chamber.
Yes, as long as it does not infringe on existing works.
Charles Hull invented the first commercial rapid prototyping technology, 3D printing.
No, wood cannot be 3D printed because it would burn before melting and extruding via a nozzle.
SHARE:
Your email address will not be published.
Updated · Feb 11, 2024
Updated · Feb 11, 2024
Updated · Feb 08, 2024
Updated · Feb 05, 2024