
Wiki Guide: How to Extract Data from Wikipedia Using an API?
![Muninder Adavelli]()

Muninder Adavelli
Updated · Feb 11, 2024
Updated · Jan 29, 2024
Raj Vardhman is a tech expert and the Chief Tech Strategist at TechJury.net, where he leads the rese... | See full bio
Florence is a dedicated wordsmith on a mission to make technology-related topics easy-to-understand.... | See full bio
This page may contain links to our partners’ products and services, which allows us to keep our website sustainable. Тechjury.net may receive a compensation when you sign up and / or purchase a product or a service using our links. As an Amazon Associate we earn commissions from qualified purchases. This comes at no extra cost to you. On the contrary, these partnerships often allow us to give you discounts and lower prices. However, all opinions expressed on our site are solely ours, and this content is in no way provided or influenced by any of our partners.
iPhones are widely acknowledged for their superior security compared to other devices. That’s why it is not surprising that there are over 1 billion active iPhone users globally. However, iPhones are not 100% safe from malware, hackers, or digital threats.
One way to boost an iPhone’s security is by using proxies. Through iOS proxy settings, you can add another security layer to protect your device—even without any prior technical knowledge.
Discover how to configure a proxy on an iPhone and the benefits of doing so in this article. Read on.
Setting up a proxy on your iPhone boosts security and privacy. The process can be executed manually, allowing you to control the settings precisely. You can also configure proxy on iPhone using a Proxy Auto-Configuration (PAC) file or via hostname for an easier setup.
Explore how to configure a proxy on iPhone using the step-by-step guides below.
|
👍 Helpful Article The level of security that you can get from a proxy depends on the service provider. Check out this list of the best proxy providers to know where and how to get proxies for your iPhone. |
iPhones do not allow proxy setup on a cellular data connection. Proxies can only be set up using a Wi-Fi connection, and you can do it manually.
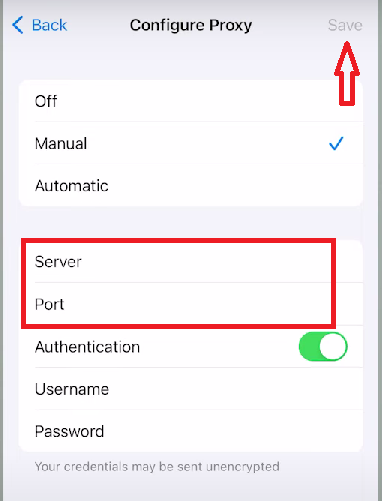
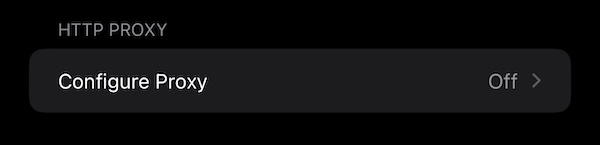
Here are the steps to set up a proxy on an iPhone:
Automatic proxy detection on iOS is also possible. All you need to do is select the “Automatic” option and save.
If automatic proxy detection is activated, your device will automatically adapt the proxy config set by the network administrator. This is common in workplaces and schools.
|
💡 Good to Know! When you configure proxy on iPhones, the supported protocols are limited to HTTP and HTTPS. If you use other protocols (like SOCKS5), you may have to use a third-party application. |
While uncommon, some proxy providers give their customers an address for a PAC file. This file contains a configuration script that can be used to set up proxies on an iPhone device.
To set up a proxy using a PAC file, follow the steps below:
If a PAC address is set, this will be prioritized over automatic proxy detection within a WiFi network.
Instead of a proxy IP address or PAC file, your proxy provider will sometimes give you a hostname. This type of setup is usually for automatic proxy rotation of shared residential, data center, and mobile proxy addresses.
Here’s how you can set it up:
|
📝 Remember! Your proxy settings will only apply to the designated WiFi network. If you switch to another network, you must repeat the same process on that network. |
Proxies can result in increased data usage or slower internet speeds. When not in use, it is best to turn off your proxy. You can disable proxy on iPhones by following the same steps.
To do that, you must:
As an operating system, iOS is already packed with safety features. That security is enhanced with proxies. You may want to consider getting a proxy for your iPhone for the following reasons:
No matter how secure your iPhone is, it means nothing if you are browsing the web unprotected. Online criminals can still access and steal your data if your IP is exposed.
People use proxies to browse the Internet anonymously. When you hide your IP, you can go online without worrying about leaving any digital footprint or sensitive information that cybercriminals may access.
Online services such as Netflix have geo-restricted content libraries. To access those, you can use a VPN or set up a proxy on your iPhone.
Some mobile applications, like Telegram, also enforce geo-blocking. If it is banned in your country, you can set up a Telegram proxy for iPhone.
Proxy protocols provide an additional layer of encryption for your web traffic. Sensitive transactions done through phones benefit from this added security layer. Secure proxies can also block malicious content before it enters your device.
|
⚠️ Warning Remember to avoid using free proxies for iPhones. Free proxies are not the safest options since they lack encryption, leaving you vulnerable to online attacks. Some of them even carry malware that can infect your device. If you’re looking for something budget-friendly, some providers offer proxy services for no more than $10 per month. IP Royal and Smartproxy only cost $7 and $8.50, respectively. |
Setting up a proxy on your iPhone is like adding an extra shield for your online safety. You can do it manually or automatically. Use a proxy to stay private, access content or apps that might be blocked in your area, and make your online transactions more secure.
Do not use free proxy services. Instead, look out for excellent and affordable options. Keep your iPhone safe by getting proxies from reliable service providers.
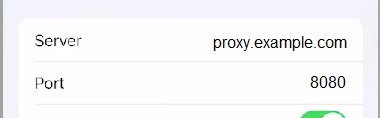
You can find it by going to iOS proxy settings (Configure Proxy>Manual). Then, check the server address and corresponding port number.
No. Safari uses the proxy configuration of the device’s system. If you go to Safari’s advanced settings to set up a proxy, it will redirect you to the system's proxy settings.
If you are using a proxy, you will see it in your device’s proxy settings. VPNs usually use an app to deliver their services, making it easier to identify them. If you are still unsure, try visiting whatismyproxy.com.
SHARE:
Your email address will not be published.
Updated · Feb 11, 2024
Updated · Feb 11, 2024
Updated · Feb 08, 2024
Updated · Feb 05, 2024